Showing posts with label art. Show all posts

Monday, June 20, 2011

DIY Project: Paint Chip Art


First off, I cannot take full credit for this project. I found it on Curbly (which is a DIYers paradise), and then linked to the original tutorial on the 3 R's blog. I was looking for inspiration for our 'in progress' laundry room and this project was calling shouting my name.

This project was so easy to do and the best part is that the plans are super versatile and can be changed according to any colour scheme.

What You'll Need:
  • Cutting Mat or Board (something heavy that the knife won't penetrate and scratch your table)
  • Straight Edge (metal rulers work well)
  • Boxcutter or Exacto Knife
  • Glue Stick (try to get a clear one, not the blue or purple kind)
  • Lots and Lots of Paint Chips
I chose the paint chips I used based on some fabric (that I later turned into a ironing board cover, which is a DIY post for another day). The fabrics had some great colours; pumpkin orange, pea green, teal, grey and sunny yellow. I wasn't too concerned about the chips matching exactly, they just needed to be in the same family.

After choosing the chips you want to use, slice them into sections. It would have taken too long to measure each slice so I just eyeballed it and everything worked out fine. Repeat this step for every paint chip you want to use. I just threw a movie on Netflix and went to work. It probably took me an hour to slice all the chips.

As a 'base' I used a single sheet of plain old computer paper. In retrospect I would have preferred something a little heavier (like cardstock) but I was just working with what I had. Next thing I did was decide the angle I wanted the strips to be on. For easiness sake I went corner to corner...however, there was a slight problem. A single strip wasn't long enough.

An easy enough fix was to join two strips end to end so that the gradient continued in both directions. I just cut off the last colour on one of the strips and laid it down to continue the line. Once it was glued in place you can't notice the seam and the effect is neat.

Repeat. Approximately a billion times.

I didn't really follow a pattern when choosing which colours I laid down. I tried to make it as random as possible. I think the hardest part was the sticky fingers caused by the glue stick. I kept a damp cloth on hand to help keep my hands (and worksurface) from getting too gummed up. When all your strips are laid down, trim around the edges and you'll be ready to frame.

Walmart had a surprising selection of good quality, wallet friendly frames. We picked up these brushed aluminum pair for $10 each and wasted no time hanging them. I love love love the way they turned out. So cheerful and a perfect accessory to our laundry room - which is still being worked on but I hope to share pictures soon.

And the fabric that started it all?

The ironing board and pictures are a lovely match! Can't wait to share the DIY tutorial for this project too!

Friday, June 17, 2011

Proud Mama

You may have noticed a sweet little face peeking out from our bookshelves in this Living Room Reveal post. If you blink you'll miss her, but she's there and she's lovely.

Yes, it's an itty bitty painting of our little kitty Kuro. Adorable, no?

It's custom pet art from Yellow Brick Home. Kim and Scott are a pair of awesome bloggers and pet artists (well, Kim is the artist) and they provide an invaluable service to all the proud pet parents out there.

After you place your order you send them a gushing email all about your pet and why they are the most awesome cat/dog/bunny/porcupine out there.  They request a couple pictures (I sent 10) and then Kim works her magic. Each custom work of art is painted with acrylics on a 4×4 inch canvas and wood panel with a 3/4 inch profile. After about a month you receive a beautifully wrapped, totally one of a kind tribute to your furry baby.

And yes, I do refer to Jeff and I as Kuro's parents. It started as a joke and never went away.

Here are some other examples of the amazing work that Kim does...

Wednesday, June 8, 2011

An Artful Home

I love having art in the home and Jeff and I have quite the collection going. We've been lucky to have been gifted with some great pieces and found some lovely ones ourselves. When considering a new piece we usually go through a checklist of sorts:
- Do we like it? Why do we like it? It's more than just thinking something is pretty. Prettiness comes and goes, but if it actually makes us feel something then it's worth a second look.
- Where are we going to put it? Though this one isn't a dealbreaker we do like to have a plan in mind for where our new piece will eventually end up.
- Does it fit with the rest of the house? I'm not trying to make our entire house match (that would be cuckoo) it's more about keeping it all in the same theme - which is currently bright, fun and a little funky.

Not too long ago I revealed our master bedroom, but we weren't quite done. There was no art! It took us a little while to find the right mix of pieces. We wanted them to work with the room, but not be too matchy matchy.

First came our DIY monogrammed pictures above the headboard.

These were super simple to do. I just typed our initials and 'and' into a word document, messed around until I found some fonts we liked and then printed them. We popped them into IKEA frames and voila - instant personalized art.
[The fonts are Graf Circulum (J), Handstand (and) and Chopin (S)}
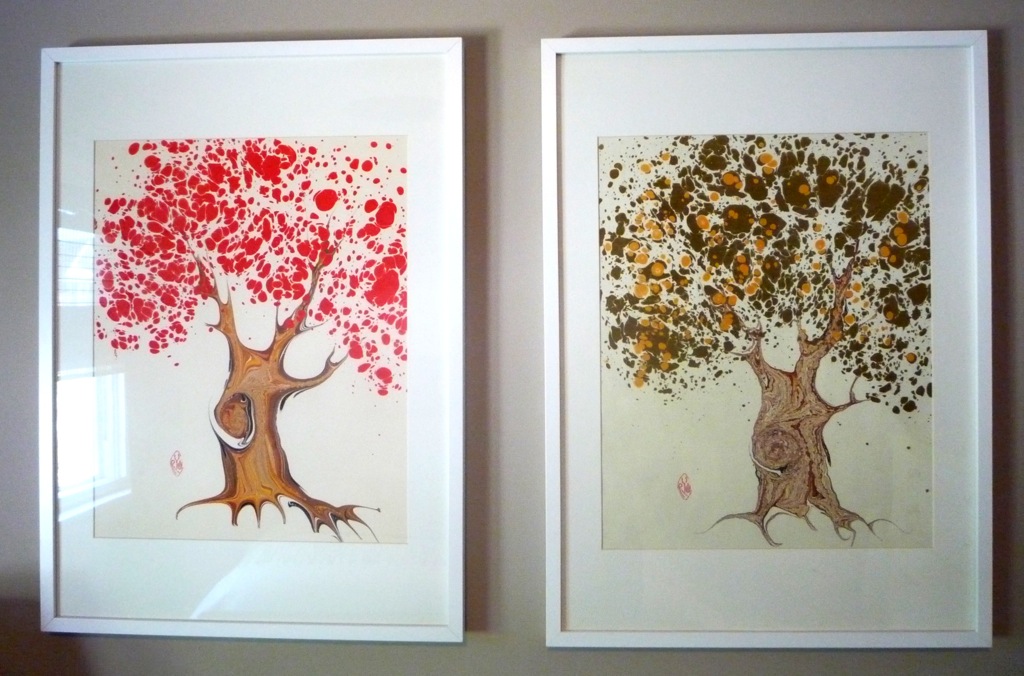
In December Jeff and I went to the One of a Kind show and we were just about to give up on finding anything we wanted to take home when we found an amazing Japanese artist who still does traditional marbling. The artist, Robert Wu, was so nice and super helpful in helping us find the perfect prints which now hang over our little reading nook.

Marbling is done one sheet at a time, so each one is unique - which I love.

Lastly, our 'gallery wall' above the dresser. Part of being art junkies is that sometimes we have more pieces than we know what to do with. This system lets us move around our current collection and add/subtract pieces when we get bored of them.

Our current collection consists of some pretty special pieces...
1. A photograph taken by Jeff's late grandfather who was an amazing photographer.
2. A painting by my bestfriend and former roommate, Carrie.
3. A photograph from our engagement shoot. Taken by the amazing Angela Y Martin.
4. Our kitty cat, Kuro.
5. Buddha. He's been with me since I moved to Toronto. This is our 4th home together.
6. I collect elephants (as well as art). This little wooden guy is from our recent trip to Dominican Republic.
7. This elephant is one of the first gifts Jeff ever bought me. He's from a little shop in Niagara on the Lake that we picked up our first summer together.
8. All our wedding mementos fit in this cute little wooden box (our invites, menu, my veil and wedding jewelry).
9. Cute converse sneakers print was a bonus from JohnWGolden's Etsy shop where we got our robot prints from (yay for freebies).

I think adding art can really personalize a home, and that's all what we're about!